How to Use a Water Pen for Decoupage
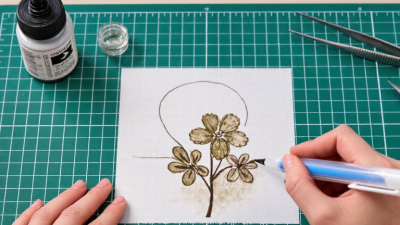
A Water Pen For Decoupage can help you dampen paper with more control than a dripping brush. Its small reservoir feeds water through a soft tip, making it useful for softening edges, shaping lightweight paper, or preparing a narrow area before applying adhesive. The effect is subtle. That is part of its appeal.
Good results depend on the paper and the amount of water you use. A thin napkin may wrinkle or tear if the tip presses too hard. Heavier paper may need more moisture, but adding water does not replace decoupage medium or glue. Test the pen on a scrap first. Watch how quickly the paper absorbs moisture, and keep a clean cloth nearby for accidental drips. Small details matter.
This guide explains how to fill and handle a water pen, prepare paper, and use gentle strokes for cleaner edges. It also covers common problems, including puddling, frayed fibers, and uneven dampness. Practice on a spare piece before working on your finished object. I still find that some papers behave unpredictably, even when I use the same technique. That can be frustrating. A slower touch, however, often makes the difference between a neat paper edge and one that looks overworked.
Understanding the Water Pen’s Role in Decoupage
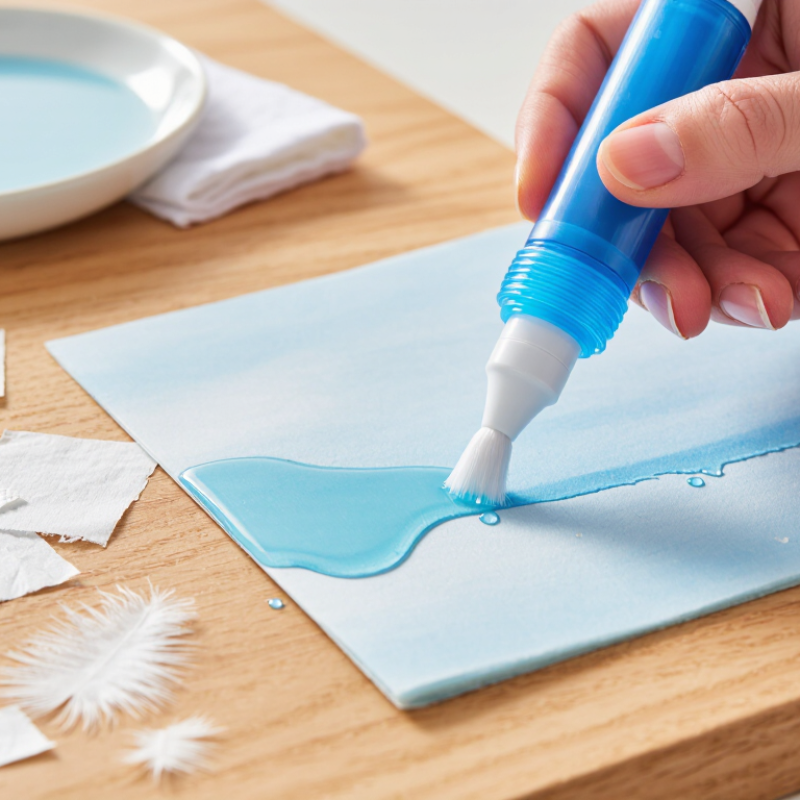
A water pen gives you controlled moisture for preparing paper before it is placed on a decoupage surface. Its narrow brush tip can dampen a line around a printed image, helping the paper tear with a soft, feathered edge. That control matters. A wet sponge can soak too wide an area, while a water pen lets you work close to a fine outline or a small detail.
The pen is a preparation tool, not an adhesive. After shaping the paper, apply decoupage medium to the surface and smooth the piece gently from the center outward. A dry brush or fingertip can help press down loose edges. Use only enough water to mark the paper; too much may blur water-based ink, wrinkle thin tissue, or leave an edge that tears unevenly. Test a scrap first. It takes a minute.
Paper behaves differently. Coated images may resist moisture, and delicate papers can split before you finish the outline. I would not expect every edge to look perfectly natural; a slightly irregular tear can blend well, but a torn detail may also lose clarity. Check the pen tip for dried residue, and wipe it clean after use so the water flow stays even.
How to Use a Water Pen for Decoupage — Understanding the Water Pen’s Role in Decoupage
| Decoupage Task |
How to Use the Water Pen |
What It Helps With |
Practical Tip |
| Preparing the paper |
Fill the reservoir with clean water and test the flow on scrap paper before working on the design. |
Provides controlled moisture without repeatedly dipping a separate brush. |
Use a light touch; the pen should release a small amount of water rather than leave a puddle. |
| Creating soft paper edges |
Trace a narrow line of water along the area where you want to separate thin paper, then gently pull or tear it. |
Can help make a feathered edge on suitable papers, which may blend more softly than a straight cut edge. |
Test first. Some papers tear unpredictably, and coated or laminated papers may not respond well. |
| Positioning a cutout |
Use the pen sparingly to dampen a small area of absorbent paper if it needs slight flexibility before placement. |
May make delicate paper easier to handle, but it is not a substitute for decoupage adhesive. |
For most projects, apply adhesive according to its instructions and position the paper while the adhesive is workable. |
| Smoothing a placed image |
Do not brush water over a glued image unless the paper and adhesive directions specifically allow it. |
A water pen can soften or distort paper and may interfere with some adhesives or printed inks. |
Use clean, dry fingers or a suitable smoothing tool to press from the center outward and ease out trapped air. |
| Working around fine details |
Apply tiny amounts of water near small shapes or curves when preparing an edge, keeping moisture away from neighboring areas. |
Its narrow brush tip can offer more control than a broad brush for localized dampening. |
Keep the tip clean and avoid touching wet adhesive with it to reduce residue buildup. |
| Cleaning and storage |
Empty the reservoir if the pen will be stored for a long period; rinse the brush tip with clean water and let it dry. |
Helps limit residue and keeps the brush tip in usable condition. |
Follow the tool’s care instructions, and do not leave water in the reservoir if freezing temperatures are possible. |
| Choosing when to use it |
Use the water pen for controlled, small-scale dampening—not for coating the whole project. |
It is most useful for localized paper preparation and detail work. |
Use the adhesive and sealant recommended for the materials and finish of your project. |
Selecting and Preparing Paper and the Base Surface
For decoupage, choose paper that becomes manageable when lightly dampened. Thin decorative paper, tissue, and lightweight printed sheets usually conform to curves more easily than thick cardstock. Check that the ink does not run: touch a damp cotton swab to a hidden corner and look for color transfer. A quick test can prevent a blurred image later. If the sheet wrinkles easily, use less water and work in small sections.
A water pen gives you control over a narrow line of moisture. Trace around the image slowly, then separate the paper along the damp edge. The result may look softly feathered rather than perfectly cut. That is often useful, though not always. Test the effect on a scrap first, especially with detailed shapes. Let the paper rest flat if its edges begin to curl.
Prepare the base surface before applying adhesive. It should be clean, dry, and free of dust, grease, or loose paint. Lightly smooth rough wood or other porous surfaces, then remove the sanding dust with a dry cloth. Very slick surfaces may need gentle scuffing so the adhesive can grip; avoid sanding through paint or veneer. I sometimes miss a tiny bump until the paper catches on it. A fingertip check helps. Place the trimmed image on the dry surface before gluing, and confirm that its edges sit where you want them.
Filling and Testing the Water Pen
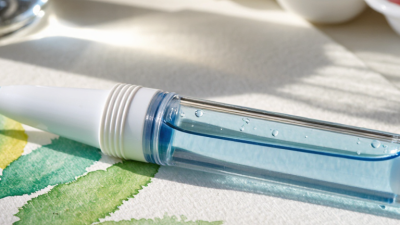
Before using a water pen for decoupage, make sure its reservoir is clean and dry. Unscrew the barrel and fill it with clean water, leaving a little air space at the top. This gives the water room to move when you press the reservoir. Tighten the cap gently; forcing it can damage the threads or cause leaks. Wipe the tip with a soft cloth, then let the pen sit upright for a minute. I once rushed this step and got a sudden drip on my paper. Not ideal.
Test the pen on scrap tissue or paper before working on your design. Press the barrel lightly and draw a short line. The tip should feel damp, not flooded. Try tracing around a small paper shape to see whether the moisture makes the edge easy to lift or tear. If water pools, release pressure and blot the tip. If the line stays dry, check that the cap is secure and the tip is clear. Results can vary with paper thickness, so test a similar piece.
Tips: Keep a paper towel nearby, and use gentle pressure. Test again after a short pause; the first stroke may not show the pen’s steady flow.
Dampening and Separating the Paper Along the Design
A water pen gives you more control than a broad brush when dampening paper around a decoupage design. Fill it with clean water, then test the flow on scrap paper. The tip should feel moist, not drip. Place your paper on a flat surface, and trace the design’s outline with a slow, steady hand. Follow curves in short strokes. Pause at corners so water does not spread beyond the edge. Let the line sit briefly; the paper should darken slightly, but it should not become soggy.
Now separate the design from the surrounding paper by gently pulling along the damp line. Use your fingertips or blunt tweezers, and support the image close to the edge. If fibers resist, add a tiny touch of water and wait a few seconds. Don’t force it. A soft, feathered edge often blends more naturally into a surface than a sharply cut one. My first try left a small nick near a flower petal because I pulled too quickly. It was a useful reminder: delicate paper needs patience, and not every edge will separate perfectly. Blot stray moisture before applying adhesive, especially on thin paper.
Positioning, Smoothing, and Sealing the Decoupage Layer
Work slowly. Place the paper cutout on a clean, dry surface, then check its alignment before adding moisture. A water pen can dampen delicate paper edges or help ease small folds into place. Touch the surface lightly; too much water may stretch thin tissue or make colors bleed. Test the paper and finish on a hidden area first.
For smoothing, move the damp tip from the center toward the edges with gentle strokes. This can help release tiny air pockets without dragging the design. If a crease remains, pause and let the paper settle instead of repeatedly wetting it. A small wrinkle may be less distracting than a torn corner. Let the layer dry fully before sealing. The water pen helps with placement, but it does not replace a compatible decoupage medium or clear topcoat. Apply the sealer in thin, even coats, following its directions, and allow each coat to dry.
Tips: Keep a dry cloth nearby. Wipe excess water from the pen tip, and use less moisture around printed details. If the paper shifts, lift and reposition it gently before it dries.
How to Use a Water Pen for Decoupage
Position the paper, smooth it gently, then apply a suitable sealer once the layer is dry.
Illustrative hands-on time per small paper piece; drying time is excluded. Actual time varies with paper, surface, and medium. A water pen can help with positioning and smoothing; use a suitable decoupage medium or sealer for the sealing step.