How to Use a Water Pen for Decoupage in 2026?
A Water Pen For Decoupage gives you more control than scissors when shaping lightweight paper around curves, corners, and small details. Its water-fed tip dampens a narrow line, helping tissue or rice paper separate along a softer edge. Decoupage instructor Nina Calder puts the idea simply: “Let the water mark the paper; don’t ask it to do the work of glue.” That distinction matters. The pen helps prepare and shape paper, while suitable decoupage medium attaches and seals it.
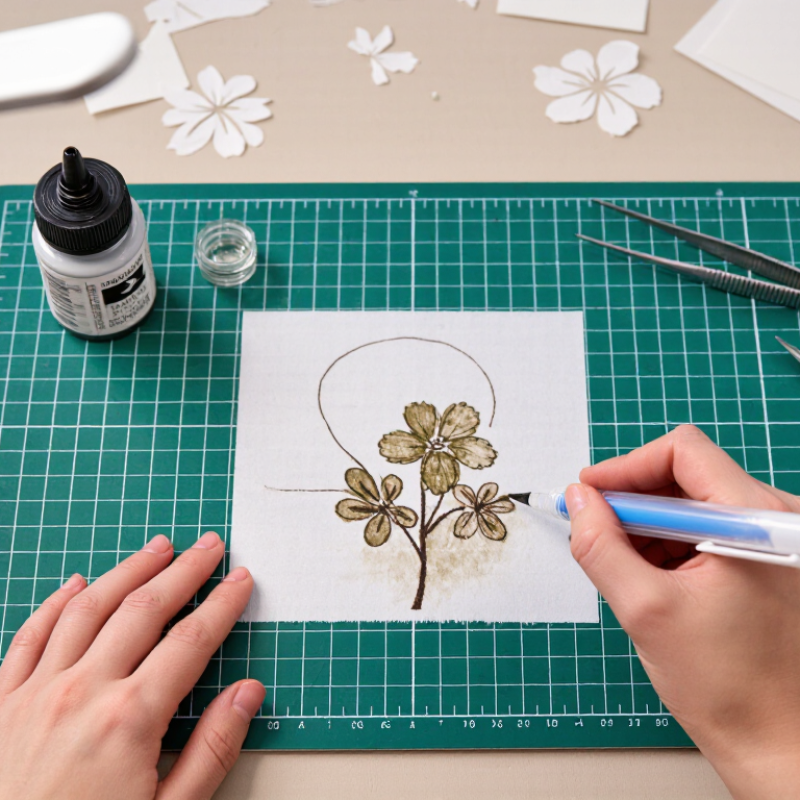
For a first test, place a printed napkin on a cutting mat and trace slowly around one small motif. Keep the tip damp, not dripping. Wait a few seconds, then lift the paper gently with tweezers or a clean fingertip. Too much water can blur ink or weaken delicate fibers. Not every paper behaves alike. A glossy image may resist tearing, while thin tissue can split before you expect it to. Try a scrap first.
This guide explores how to choose a pen, control its water flow, prepare paper, and apply a smooth finish. You’ll also see where the technique can falter: ragged edges, over-wet paper, and glue pooling beneath a motif. The method takes practice. Even careful hands make uneven marks sometimes. That is useful feedback, not a reason to hide the test piece. Use small strokes, let each layer dry, and check the result under good light before adding another coat.
Understanding the Water Pen’s Role in Decoupage
A water pen is a small moisture-control tool, not an adhesive. Its reservoir feeds water through a soft tip, letting you dampen a paper edge without soaking the whole piece. In decoupage, that can help shape delicate tissue, soften a cut line, or lift a misplaced scrap before the adhesive sets. Work over a scrap sheet and touch the tip to the paper lightly. A shiny wet patch means you have used too much. It is easy to overdo.
The pen’s main value is precision. A narrow tip can trace a curve around a leaf or picture, while a broader tip suits larger pieces. It can also help soften water-soluble paper edges, but results vary with paper coating and thickness. Test a small offcut first. The Canadian Conservation Institute’s guidance on incorrect relative humidity identifies sustained levels above about 65% as a mold concern for collections. That is a storage warning, not a working limit, but it underlines why damp decoupage pieces should dry fully before storage. The National Park Service’s Museum Handbook also stresses stable environmental conditions for paper collections. Keep the finished piece flat, use gentle airflow, and avoid stacking it while cool or damp. I still find the pen less predictable on glossy paper; a brush may give better control there.
Choosing Suitable Paper, Surfaces, and Adhesives
Choose thin, flexible paper for water-pen decoupage. Tissue paper and lightweight printed paper usually bend around curves with fewer creases. Thick cardstock can resist shaping and may lift at the edges. Test a small scrap first. Some inks blur when damp, even when the paper looks dry.
Prepare a clean, dry surface before adding adhesive. Bare wood and paper generally accept water-based decoupage medium well; slick or sealed surfaces need light preparation and a compatibility test. Glass can work, but adhesion depends on the medium and curing instructions. A water pen controls small amounts of water; it is not a replacement for adhesive. Keep its tip damp, not dripping, to soften or guide paper edges without flooding them.
Spread a thin, even adhesive layer, then position the paper gently. Use the pen sparingly to nudge a corner or smooth a tiny wrinkle. Too much moisture can stretch paper, move ink, or leave a cloudy patch. Let each layer dry as directed before sealing. I still sometimes chase one last crease and make it worse. Step back, let it settle, and check the result in good light.
Filling the Pen and Preparing the Paper Design
A water pen gives controlled moisture for shaping thin paper before decoupage. Fill the reservoir with clean water, then twist the barrel gently until the tip feels damp. Don’t squeeze hard: a shiny, dripping tip can leave puddles and make tissue paper buckle. Cut or tear your design first, and test the pen on a scrap from the same sheet. Paper weight matters; a light napkin reacts faster than a heavier printed sheet. ISO 187:2022 specifies conditioning paper at 23°C and 50% relative humidity, a useful reminder that room conditions affect how paper handles moisture. You do not need a laboratory setup—just avoid a damp, chilly workspace.
Trace around small design details with the damp tip, wait a few seconds, then lift or tear gently along the softened line. Keep the paper on a dry, flat surface, and prepare only one or two pieces at a time. If the edge feathers too much, use less water; if it tears unpredictably, pause and let the sheet dry before trying again. I still find this step easy to rush. That usually shows later as a wrinkled corner.
Tips: Keep a cloth nearby, blot the pen tip before each pass, and label your scrap tests by paper type. A tiny test saves a larger repair.
Smoothing and Sealing the Finished Decoupage piece
After the final decoupage layer dries, smooth it gently with a clean, soft brush or fine sanding pad. Use light pressure; aggressive sanding can expose paper edges or scuff printed details. A water pen can reactivate water-based medium, so test it on a scrap first. Add only a little moisture, then guide trapped wrinkles outward from the center. Let the surface dry fully before sealing. Patience matters here.
Apply a compatible clear sealer in thin, even coats, following its label for drying and recoat times. The American Coatings Association reported that U.S. paint and coatings industry sales reached $31.2 billion in 2022, reflecting how widely protective finishes are used across surfaces. That figure is industry context, not a guarantee that every sealer suits paper. Test your chosen finish on a matching offcut: some coatings can darken colors, soften ink, or leave brush marks. I still find the edges easy to miss.
Tips: Keep the water pen barely damp, and wipe excess water from its tip. Seal in a dust-free spot; a stray fiber can become trapped beneath the finish. Don’t rush the last coat.
How to Use a Water Pen for Decoupage in 2026: Smoothing and Sealing
A practical coat-count guide for smoothing and protecting a finished decoupage piece.
Use the water pen sparingly to dampen and smooth paper edges without soaking the surface. A practical plan is one adhesive layer beneath the paper and two sealing coats; an additional coat may be used for extra protection. Let each layer dry according to the product instructions, since drying times and suitable coat counts vary.