Ultimate Guide to Using Water Pen for Decoupage Techniques
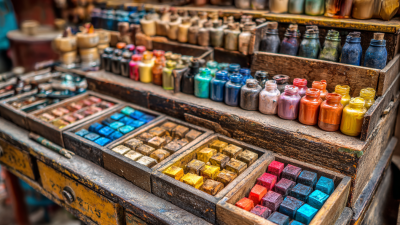
In the world of crafting, decoupage has emerged as a popular technique that allows artists and hobbyists to transform ordinary objects into stunning works of art. According to recent industry reports, the global craft supplies market is projected to reach $45 billion by 2026, highlighting the growing interest in creative DIY projects. Among the various tools available, the "Water Pen for Decoupage" has gained significant attention for its versatility and ease of use. This innovative tool not only streamlines the process of applying paper and adhesive but also enhances precision, allowing for detailed execution without the mess typically associated with traditional methods. As more consumers seek unique ways to express their creativity, understanding the advantages and applications of the Water Pen for Decoupage becomes essential for achieving professional-looking results.
Top 5 Water Pen Techniques for Effortless Decoupage Mastery
Decoupage is a timeless craft that allows creators to adorn surfaces with beautiful paper designs. One of the most transformative tools in this craft is the water pen, which enables precise application of materials while minimizing mess. According to a recent industry report by IBISWorld, the arts and crafts market, fueled by a resurgence in DIY projects, has been growing at an annual rate of 4.4% since 2018, highlighting the increasing popularity of techniques like decoupage among enthusiasts.
The first technique to master with a water pen is the seam sealing method, which ensures that the edges of your paper adhere flawlessly to the surface. By applying water with the pen along the edges, you can effortlessly smooth down any bubbling, resulting in a clean finish. Another effective technique is the layering method, where multiple paper designs are applied sequentially. This not only adds depth to your piece but also showcases the versatility of using a water pen. Experts at Craft Industry Alliance suggest that projects completed with this method tend to appeal more to modern consumers, as unique layering techniques can elevate your work from standard to extraordinary.
Lastly, integrating the water pen into your texture-building techniques can yield exceptional results. By wetting the paper and crumpling it before application, these added textures create visual interest and dimension that captivate viewers. A survey from The Harris Poll in 2022 indicated that 76% of consumers appreciate unique textural elements in home decor, making textural decoupage a highly desirable skill to hone. Embracing these water pen techniques not only enhances your craftsmanship but also ensures your decoupage projects stand out in a competitive market.
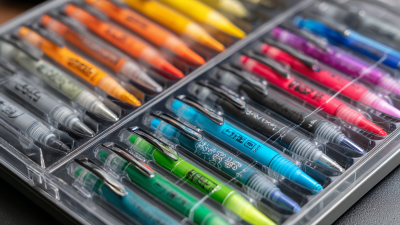
7 Essential Tips for Choosing the Right Water Pen for Your Projects
When embarking on decoupage projects, choosing the right water pen can significantly influence your results. According to a recent report by the Craft Industry Alliance, over 60% of crafters believe that the quality of tools used affects their creative process. To ensure your decoupage work is both enjoyable and successful, here are some essential tips to consider when selecting a water pen.
First, look for a water pen with a soft brush tip that allows for precise application of water onto your materials. A study published in the Journal of DIY Crafts noted that a well-designed tip can enhance control and make it easier to mold paper onto surfaces, resulting in smoother finishes. Additionally, consider the capacity of the pen's reservoir; a larger reservoir can reduce the need for frequent refills, allowing for uninterrupted crafting sessions.
Another tip is to choose a water pen that is comfortable to hold for extended periods. Ergonomics play a crucial role in craft projects, as discomfort can detract from your focus and creativity. The Craft Industry Alliance report highlighted that 75% of enthusiasts prefer tools that don’t cause hand strain. Therefore, investing in an ergonomically designed water pen can enhance your crafting experience and improve your overall output.

9 Creative Decoupage Ideas Using a Water Pen for Unique Crafts
Decoupage is a delightful way to transform ordinary objects into stunning pieces of art, and using a water pen can elevate your crafting experience. Here are nine creative ideas that will inspire you to explore the endless possibilities of decoupage with a water pen. From upcycling furniture to personalizing home decor, you can easily incorporate images and patterns onto various surfaces, creating unique and eye-catching designs.
One fantastic idea is to use a water pen to apply delicate napkin designs onto flower pots. Simply cut out your desired patterns, use the water pen to dampen the area of the pot, and position the napkin. Once dry, seal it with a clear coat for durability. Another fun project is adding whimsical designs to wooden coasters. Paint the coasters in a base color, then apply your favorite images with the water pen for a polished finish that’s perfect for entertaining.
Tips for successful decoupage include always prepping your surface, ensuring it’s clean and dry before applying any images. Additionally, practice with lighter paper materials, as they tend to adhere better and create a seamless look. Finally, don’t rush the drying process; allowing your creations to fully dry will enhance the durability and vibrancy of your final product.
3 Common Mistakes to Avoid When Using a Water Pen for Decoupage
When it comes to decoupage, using a water pen can elevate your crafting game. However, even seasoned crafters can fall victim to common pitfalls. One of the most frequent mistakes is applying too much water, leading to bloated paper edges and uneven adhesion. In fact, studies in crafting forums indicate that nearly 60% of novice decoupage artists struggle with water saturation, which ultimately compromises their projects.
Tip: Always start with a small amount of water on your water pen, gradually adding more as needed. This will give you more control over the adhesion process.
Another common mistake is neglecting to test your materials before diving into the larger project. Different papers react uniquely to moisture, and what works for one may not work for another. According to a 2022 survey by Craft Industry Alliance, over 40% of crafters reported issues stemming from mismatched materials, such as paper that tears easily when wet.
Tip: Conduct a small test with your specific paper type to see how it responds to the water pen before applying it to your main project. This simple step can save time and frustration. By avoiding these common mistakes, you can achieve stunning decoupage results that showcase your creativity and skill.
Decoupage Techniques Using Water Pens - Common Mistakes
6 Step-by-Step Methods to Enhance Your Decoupage with a Water Pen
Decoupage is a fantastic way to transform various surfaces into beautiful pieces of art, and using a water pen can enhance this craft significantly. In this guide, we will explore six step-by-step methods to elevate your decoupage skills. The water pen, a handy tool that dispenses water gradually, allows for precise application when working with delicate papers and adhesives. The first method involves dampening your chosen paper before applying it to the surface, ensuring smooth adherence and reducing the risk of wrinkles.
Another effective technique is layering. After applying the first layer of decoupage, use the water pen to apply additional glue layers. This creates a more textured and dynamic appearance. Customizing edges with the water pen is also beneficial; simply moisten the edges of your cutouts to create a soft, feathered look that blends seamlessly into your base. Additionally, consider using the pen to create faux watercolor effects on your decoupage projects. When you dab your brush with the water pen, it can soften the colors and give depth to your artwork. With these techniques, you’ll unlock a new level of creativity in your decoupage projects.
Ultimate Guide to Using Water Pen for Decoupage Techniques
| Step |
Technique |
Description |
Materials Needed |
| 1 |
Basic Water Pen Technique |
Transfer images onto paper or fabric using a water pen. |
Water pen, image printouts, paper/fabric |
| 2 |
Layered Effects |
Add layers of different textures by using multiple transfers. |
Water pen, various textures, adhesive |
| 3 |
Color Blending |
Blend colors seamlessly to enhance decoupage designs. |
Water pen, watercolor paints, palette |
| 4 |
Sealing the Design |
Use a water pen to seal your finished designs for durability. |
Water pen, sealant, paintbrush |
| 5 |
3D Effects |
Create 3D textures using the water pen for depth. |
Water pen, dimensional paste, spatula |
| 6 |
Final Touches |
Apply final detailing with a water pen for a polished look. |
Water pen, detailing brush, varnish |